macでインフォマティクス

macでインフォマティクス

HTS (NGS) 関連のインフォマティクス情報についてまとめています。

Bandageを使ってアセンブリグラフからターゲットの配列を選抜する

2020 3/12 写真差し替え、誤字修正、タイトル修正


 De novoアセンブルして得たcontig配列から特定の配列を選抜するにはどうすれば良いだろうか?全ゲノムのショットガンシーケンシングを行なっていても、目的の配列はそのサブセットでしかないことは頻繁にある(e.g.プラスミド、オルガネラゲノム、環境サンプル(メタゲノム)中の特定のゲノム配列、抗生物質耐性遺伝子、HLA ...)。Ryan R. Wickらが開発したBandageは、アセンブリグラフを読み込んで視覚化し、グラフを分析するためのGUIツールである。Bandageを上手く使うと、任意のアセンブリ配列を素早く選抜することができる。簡単に流れを説明してみる。


Bandageは以前にも一度紹介しています。


選抜する流れ

0、アセンブリのグラフファイルを用意する。ここではSPAdesのアセンブリグラフを使う(*1)。ここで使うデータは、モデルシアノバクテリアの1つSynechocystis sp. PCC 6803(以後S.6803)のバルクのシーケンシングデータになる。このS.6803はクロモソームに加えて複数のプラスミドを持っているが、このプラスミドのうちの1つpSYSXの配列には、細菌としては非常に長い20-kb以上のrepetitive regionが2コピー存在している。また、pSYSXのrepetitive regionの一部はクロモソーム配列とも高い塩基配列相同性を示す。そのため、S.6803のショートリードシーケンシングから作成したアセンブリグラフは、pSYSXのノードとクロモソーム配列のノードが絡まった状態で出力される。このままでは、グラフのまま今後の解析を進めることが困難である。この状態からpSYSX由来グラフをラフに分離してみる。


1、De noboアセンブリして得たGFAファイルをBandageに読み込む。一番上の絡まった大きなグラフがクロモソームとプラスミド配列を含むグラフである。SPADes出力のassembly_graph_with_scaffolds.gfaを使用している。

f:id:kazumaxneo:20200311213812p:plain

下の方のエッジがない孤立したノード(ノードはcontig)は、カバレッジの不足やDNAの物理的切断などによって、その先の接続情報が出なかった事を意味する。今回はリード数をクロモソームの平均カバレッジの5x(pSYSXでは10x以上)に抑えてアセンブリしているため、孤立ノードの多さはカバレッジ不足が原因である。(*2)


2、公開されているpSYSXの配列をクエリにしてblastnを実行する。

f:id:kazumaxneo:20200311215307p:plain


感度が高すぎる場合はパラメータを厳しくする。

f:id:kazumaxneo:20200311215727p:plain


3、初期はノードにランダムな色がアサインされていたが、blastnを実行するとクエリの配列と相同性があるノードだけ色が付いた。

f:id:kazumaxneo:20200311215248p:plain

色はヒットしたcontigの領域に対応して虹色になっている。色は重要な意味を持つ場合がある。例えば異なる2つのノードに同じ青がアサインされているなら、この2つのノードはクエリの同じ領域の配列がヒットしていることを示唆している。


4、blastヒットした大きなグラフをドラッグして囲んで選択した。囲んだ領域の全サイズが右端に表示される。トータルサイズが500-kbを超えており、また平均カバレッジが5.8xになっている。pSYSXのサイズは106-kbほどなので、このグラフにはクロモソーム配列のグラフも混ざっていると思われる。

f:id:kazumaxneo:20200311220213p:plain


5、不要なノードを消去する。不要なノードを囲ってremoe nodesを実行する。

Edit => Remove selection from graph

f:id:kazumaxneo:20200311220827p:plain

消えた。

f:id:kazumaxneo:20200311220911p:plain


今回はblastでヒットしたノード以外消したいので、別のアプローチを取る。左のメニューのScopeからaround BLAST hitsを選択、改めてDraw graphをクリック。

f:id:kazumaxneo:20200311221028p:plain

blastヒットしたgraphのみ視覚化された。

f:id:kazumaxneo:20200311221241p:plain


6、一旦出力して再読み込みする。

Output => save visible graph to GFA

f:id:kazumaxneo:20200311221601p:plain

File => Load graph

f:id:kazumaxneo:20200311221723p:plain

再描画する前にScopeをEntire graphに戻しておく。


7、blastヒットしたノードを含むグラフのみ再描画された。

f:id:kazumaxneo:20200311221949p:plain


8、今度はクロモソーム配列をクエリにしてblastn検索する。一部のノードが高い相同性を示している。どうやら先程はblastnの感度を上げすぎてしまい、部分的に似たクロモソーム配列も釣り上げてしまったらしい。明らかにchr由来と思われるノード全体に色がついたnodeを消す。色がついたnodeを選択し、Edit => Remove selection from graph

f:id:kazumaxneo:20200311222241p:plain


9、より細かい部分を修正していく。blastのウィンドウでpSYSXだけを選択。

f:id:kazumaxneo:20200311224008p:plain

blastウィンドウは閉じなくても良い。クエリを選択するだけで色は切り替わる。

pSYSX

f:id:kazumaxneo:20200311224150p:plain
chr

f:id:kazumaxneo:20200311224153p:plain


右上の方の先が切れたノードはchr由来配列であることが分かる。選択して消す。

f:id:kazumaxneo:20200311224815p:plain

消した後、random colorをアサインした。nodeの太さを倍にしている。トータルのサイズは100,593-bpでpSYSXの106-kbに近くなっている。


10、グラフをよく見ると分岐がないのにも関わらず切れているノードがある。これらを1つにまとめる。

f:id:kazumaxneo:20200311225802p:plain

Edit => Merge all possible nodes、またはMerge selected nodes(選択中のノードのみ)を実行(link1, link2)。

f:id:kazumaxneo:20200311225555p:plain

少しシンプルになった。

f:id:kazumaxneo:20200311230838p:plain


11、おまけ1。誤りを許容して、よりシンプルなグラフにすることもできる。分岐部分のノードそれぞれについて、片方のノードを選択。

f:id:kazumaxneo:20200311231601p:plain

Edit => Remove selection from graphで消す。

f:id:kazumaxneo:20200311231604p:plain

Merge all possible nodesでマージした。1つのグラフになった。

f:id:kazumaxneo:20200311231608p:plain

Output => save visible graph to GFAで出力する。


12、おまけ2。以下のdepthが25.4xのノード(画像中央)は右側のノードよりdepthが2.5倍ほど多い。

f:id:kazumaxneo:20200311232049p:plain


repetitiveな配列が1つの配列として表現されている可能性があるので、2つにduplicateする。

Edit => Duplicate selected nodes

f:id:kazumaxneo:20200311232318p:plain


2つになった。Depthも半分ずつになっている。

f:id:kazumaxneo:20200311232605p:plain


名前を変える。

Edit => Change node name

f:id:kazumaxneo:20200311232614p:plain


このようにBandageを使って視覚化して進めることで、アセンブリ後のラフな処理が簡単に行えます。ぜひ使いこなしてください。

グラフ関連のツールは色々公開されています。今後も紹介していきます。

引用

Bandage: interactive visualization of de novo genome assemblies
Ryan R. Wick, Mark B. Schultz, Justin Zobel, Kathryn E. Holt
Bioinformatics, Volume 31, Issue 20, 15 October 2015, Pages 3350–3352


関連

http://kazumaxneo.hatenablog.com/entry/2019/03/25/073000


*1

アセンブリのグラフは通常GFA1、GFA2、FASTGなどの形式で記録されている。SPAdesはGFAとFASTGでグラフを出力する。


*2

孤立ノードは低レベルの汚染があるアセンブリで良く見られる。


rocker projectのrstudioコンテナを使う

2020 5/12  説明追加

2020 10/1 リンク追加


ライブラリによって要求するRのバージョンが異なり、新しいツールをテストできないことがある。そのような場合、 r-baseのバージョン管理されたdockerイメージを使うと、その場限りの仮想環境にツールをインストールして、気軽にテストすることが出来る。また、rocker projectが提供しているバージョン管理されたdocker shinyイメージを使うと、バージョン管理されたrstudioを使用することも出来るようになる。コンテナイメージのダウンロードと立ち上げだけ確認しておく。


Dockerhubのr-base(3.1.3 ~ 3.6.3)

https://hub.docker.com/_/r-base?tab=tags

f:id:kazumaxneo:20200310235204p:plain

pull

#例えば3.6.0
docker pull r-base:3.6.0

#3.5.3
docker pull r-base:3.5.3

#3.4.1
docker pull r-base:3.4.1


3.6.0を立ち上げる。コンテナ終了時に自動的に消すなら"--rm"をつける。

docker run --rm -it r-base:3.6.0

#コンテナ内でコマンドをうつ
docker run --rm -it r-base:3.6.0 /bin/bash


rocker project HP

https://www.rocker-project.org

Github

こちらを読んでみて下さい。

https://www.gis-blog.com/rocker/


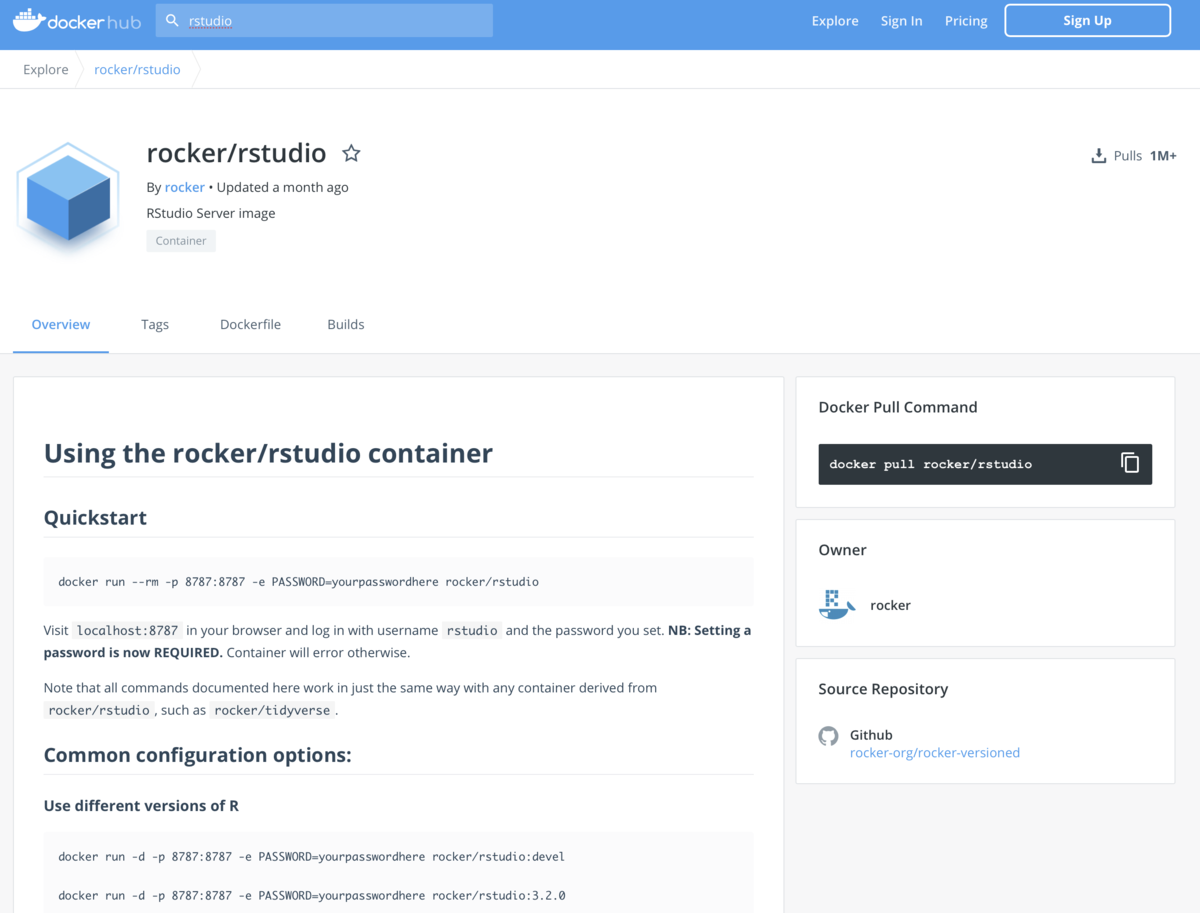
Dockerhubの Rstudio

https://hub.docker.com/r/rocker/rstudio

f:id:kazumaxneo:20200311003608p:plain

tag

https://hub.docker.com/r/rocker/rstudio/tags

#最新
docker pull rocker/rstudio:latest

#例えば3.6.2
docker pull rocker/rstudio:3.6.2

#例えば3.5.1
docker pull rocker/rstudio:3.5.1


 パスワードを指定してRstudioを立ち上げる。デフォルトではポート番号8787に対応している。

docker run -e PASSWORD=yourpassword --rm -p 8787:8787 rocker/rstudio

ブラウザでlocalhost:8787にアクセスする。ユーザー名はrstudio、そして指定したパスワードを入れてログインする。

f:id:kazumaxneo:20200513175831p:plain


Rstudioがブラウザ内で立ち上がる。

f:id:kazumaxneo:20200223161439p:plain

自分のデータはFileからアップロードする。

f:id:kazumaxneo:20210515164302p:plain


他のユーザーもアクセスするためには、一度コンテナに端末からルートログインして、adduserでユーザを加えておく必要があります。手順はhttps://github.com/rocker-org/rocker/wiki/Using-the-RStudio-imageを確認して下さい。


特定のスクリプトやツールを入れて使い回すなら、参考リンクにもあるように、ツールをインストールしてcommitしておくと良いと思います。便利な世の中になりましたね。


2022/01/10

rocker/tidyverse

https://hub.docker.com/r/rocker/tidyverse/tags

#latest
docker pull rocker/tidyverse:latest

#例えば4.1.0
docker pull rocker/tidyverse:4.1.0

#例えば4.0.0 ubuntu18
docker pull rocker/tidyverse:4.0.0-ubuntu18.04

#例えば3.6.3
docker pull rocker/tidyverse:3.6.3

#立ち上げる
docker run -d -p 127.0.0.1:8787:8787 rocker/tidyverse:4.1.0


追記

2020 10/1

参考


2021 6/9


ノイズの多いロングリードからリピートを探す Noise Cancelling Repeat Finder

間違って2回Noise Cancelling Repeat Finderのインストールについて投稿してしまいました。申し訳ありません。 


 タンデムDNAリピートはロングリード技術でシーケンスできるが、これらの技術の高いエラー率を考慮した計算ツールがないため、正確に解読できない。 ここでは、Pacific BiosciencesおよびOxford Nanoporeシーケンサーによって生成されたノイズの多いロングリードで、指定されたモチーフの推定タンデムリピートを明らかにするNoise-Cancelling Repeat Finder(NCRF)を紹介する。 シミュレーションデータでNCRFを検証して、さまざまな長さのモチーフを持つタンデムリピートを特定し、2つの代替ツールと比較して優れたパフォーマンスを示した。 NCRFは、実際のヒト全ゲノムシーケンスデータを使用して、熱ショックストレス応答に関与する(AATGG)nの繰り返しの長い配列を特定した。NCRFはCで実装され、いくつかのpythonスクリプトでサポートされ、biocondaおよびhttps://github.com/makovalab-psu/NoiseCancellingRepeatFinderで入手できる。


インストール

macos10.14のanaconda3.7環境にて、python2.7の仮想環境を作ってテストした。

ビルド依存

  • gcc or similar C compiler and linker
  • python (tested with version 2.7, not likely to work with python 3)

Github

https://github.com/makovalab-psu/NoiseCancellingRepeatFinder

#bioconda (link)
conda create -n ncrf -y python=2.7
conda activate ncrf
conda install -c bioconda -y ncrf

#from source
git clone --branch v1.01.00 https://github.com/makovalab-psu/NoiseCancellingRepeatFinder.git
cd NoiseCancellingRepeatFinder/
make
./make_symbolic_links.sh

NCRF -h

$ NCRF -h

NCRF-- Noise Cancelling Repeat Finder, to find tandem repeats in noisy reads

  (version 1.01.02 20190429)

usage: cat <fasta> | NCRF [options]


  <fasta>               fasta file containing sequences; read from stdin

  [<name>:]<motif>      dna repeat motif to search for

                        (there can be more than one motif)

  --minmratio=<ratio>   discard alignments with a low frequency of matches;

                        ratio can be between 0 and 1 (e.g. "0.85"), or can be

                        expressed as a percentage (e.g. "85%")

  --maxnoise=<ratio>    (same as --minmratio but with 1-ratio)

  --minlength=<bp>      discard alignments that don't have long enough repeat

                        (default is 500)

  --minscore=<score>    discard alignments that don't score high enough

                        (default is zero)

  --stats=events        show match/mismatch/insert/delete counts

  --positionalevents    show match/mismatch/insert/delete counts by motif

                        position (independent of --stats=events); this may be

                        useful for detecting error non-uniformity, to separate

                        perfect repeats from imperfect

  --help=scoring        show options relating to alignment scoring

  --help=allocation     show options relating to memory allocation

  --help=other          show other, less frequently used options


  The output is usually passed through a series of the ncrf_* post-processing

  scripts.

ncrf_cat.py

$ ncrf_cat.py

you have to give me at least one file


usage: ncrf_cat <file1> [<file2> ...] [--markend]

  <file1>    an output file from Noise Cancelling Repeat Finder

  <file2>    another output file from Noise Cancelling Repeat Finder

  --markend  assume end-of-file markers are absent in the input, and add an

             end-of-file marker to the output

             (by default we require inputs to have proper end-of-file markers)


Concatenate several output files from Noise Cancelling Repeat Finder.  This

is little more than copying the files and adding a blank line between the

files.


It can also be used to verify that the input files contain end-of-file markers

i.e. that they were not truncated when created.

> ncrf_summary.py -h

$ ncrf_summary.py -h

unrecognized option: -h


usage: ncrf_cat <output_from_NCRF> | ncrf_summary [options]

  --minmratio=<ratio>  discard alignments with a low frequency of matches;

                       ratio can be between 0 and 1 (e.g. "0.85"), or can be

                       expressed as a percentage (e.g. "85%")

  --maxnoise=<ratio>   (same as --minmratio but with 1-ratio)


Typical output:

  #line motif seq        start end  strand seqLen querybp mRatio m    mm  i  d

  1     GGAAT FAB41174_6 1568  3021 -      3352   1461    82.6%  1242 169 42 50

  11    GGAAT FAB41174_2 3908  5077 -      7347   1189    82.4%  1009 125 35 55

  21    GGAAT FAB41174_0 2312  3334 -      4223   1060    81.1%  881  115 26 64

   ...

ncrf_to_bed.py -h

$ ncrf_to_bed.py -h

unrecognized option: -h


usage: ncrf_cat <output_from_NCRF> | ncrf_to_bed [options]

  --minmratio=<ratio>  discard alignments with a low frequency of matches;

                       ratio can be between 0 and 1 (e.g. "0.85"), or can be

                       expressed as a percentage (e.g. "85%")

  --maxnoise=<ratio>   (same as --minmratio but with 1-ratio)


Typical output is shown below.  The 6th column ("score" in the bed spec) is

the match ratio times 1000 (e.g. 826 is 82.6%).

  FAB41174_065680 1568 3021 . - 826

  FAB41174_029197 3908 5077 . - 824

  FAB41174_005950 2312 3334 . - 811


テストラン

1、リピートを探索する。

cd /NoiseCancellingRepeatFinder/
cat example.fa | NCRF GGCAT > example.ncrf

cat example.ncrf

f:id:kazumaxneo:20200311091151p:plain


 2、サマリーレポート

ncrf_cat.py example.ncrf | ncrf_summary.py

$ ncrf_cat.py example.ncrf | ncrf_summary.py

#line motif seq start end strand seqLen querybp mRatio m mm i d

WARNING: input alignments did not contain an event stats line

         (NCRF --stats=events would create that line)

1 GGCAT NCRF_EXAMPLE 3495 4737 + 50000 1242 NA NA NA NA NA


引用
Noise-cancelling repeat finder: uncovering tandem repeats in error-prone long-read sequencing data

Harris RS, Cechova M, Makova KD

Bioinformatics. 2019 Nov 1;35(22):4809-4811

オルガネラゲノムをターゲットアセンブリする GetOrganelle

2020 3/9 コメント修正

2020 3/9 誤字修正

2020 3/24 実行例の間違い修正

2020 3/27 コマンド修正

2020  9/5 コマンドが変更されているため手順を修正

2020 9/12 論文追記

2020 10/1 論文リンク追加

2020 10/9 コマンド修正

2022 1/5 誤字修正


 オルガネラには、plastome およびmitogenomeとも呼ばれる、プラスチド(葉緑体および他の形態のプラスチドを含む)とミトコンドリアのゲノムが含まれている。サイズが約120〜150 kbのほとんどのplastomeは、大きな単一コピー(LSC)領域と小さな単一コピー(SSC)領域を分離する一対の逆方向反復領域(IR)で、保存された環状および4分割構造を維持している[ref.1、 2]。mitogenomeはすべての真核生物に存在し、ゲノムのサイズと形態に高い多様性を示している。現在までに、6つの主要なタイプのmitogenome組織が認められている[ref.3]。それらのうち、動物はサイズが11-28 kbの単一の環状mitogenomeを持っている(タイプI)。菌類と植物には、サイズが19〜1000 kbのイントロンありの単一の環状mitogenome(タイプII)、またはサイズが20〜1000 kbの環状の大きな分子と環状の小さな分子の2つからなるプラスミド様分子(タイプIII)、またはサイズ1〜200 kbの均一な線形mitogenomeが見つかる(タイプV)。これまで、オルガネラDNAマーカーは、系統発生[ref.4-8]およびDNAバーコード[ref.9-12]に最も広く使用されてきた。ハイスループットシーケンステクノロジーの急速な進歩以来、シーケンスコストは近年大幅に減少した。単一細胞内のオルガネラゲノムのコピー数が多いため、低カバレッジ全ゲノムシーケンシング(WGS)データから完全なオルガネラゲノムを構築するのに十分なリード値を取得することが可能になっている[ref.13、14]。

 これまでのところ、アセンブリの品質はテストされていないが、GenBankhttps://www.ncbi.nlm.nih.gov/で利用可能な2937のplastomeと9217のmitogenome(8128の動物、563の真菌、60の植物、255の原生生物を含む)が利用可能である(2019年4月15日アクセス)。オルガネラゲノムをアセンブリする多くのプロセスまたはパイプラインが記述されている。たとえば、SPAdes [ref.15]、SOAPdenovo2 [ref.16]、およびCLC Genomics Workbench(https://www.qiagenbioinformatics.com/)は、WGSデータをアセンブルするために広く使用されいる。アセンブル後、オルガネラゲノムスキャホールド/コンティグが選択され、さらなる連結[ref.17]またはアセンブリ後のギャップのフィルインとクローズが行われる[ref.18、19]。ただし、これらのアプローチは計算量が多く、オルガネラゲノムの完全性の可能性は限定的である[ref.20]。 IOGA(反復オルガネラゲノムアセンブリ)パイプライン[ref.21]には、Bowtie2 [ref.22]、SOAPdenovo2、SPade、およびプラスチド関連リードの選抜とde novoアセンブリ実行のための他の依存関係が組み込まれた。しかしコンティグは他のプログラムによって完成させる必要がある。 ORG.asm [ref.23]とNOVOPlasty [ref.24]は、完全なオルガネラゲノムのde novoアセンブリを実行する高速ツールとして報告された。しかし、両方のツールは、最近のプレプリント発表までは体系的に比較されていなかった[ref.25]。Freudenthalら [ref.25]は、7つの葉緑体アセンブリツールのベンチマークを提示し、それらのアセンブラの間で大きな違いを発見した。彼らのテストでは、ツールキットGetOrganelle(https://github.com/Kinggerm/GetOrganelle)は、一貫性、正確性、成功率において、他のすべてのアセンブラを大幅に上回った。Freudenthalら [ref.25] はGetOrganelleの限られたアプリケーションスコープと限られたパラメーター範囲のみをテストしたにもかかわらず。plastomeなどのオルガネラゲノムには、通常、フリップフロップ構成またはリピートによって媒介される他のisomersがある[ref.26-28]。これは、GetOrganelle以外の上記のツールやこのベンチマークテスト[ref.25]ではカバーされない。

 GetOrganelleツールキットは、ターゲットオルガネラリードをWGSデータからリクルートし、アセンブリグラフを操作および解きほぐし、ラベル付きアセンブリグラフとともに信頼性の高いオルガネラゲノムを生成し、ユーザーフレンドリーな手動での完了と修正のためのスクリプトとライブラリを提供する(論文図1)。

このスクリプトは、 Bowtie2を使用し、ターゲットゲノムまたはフラグメントシーケンスをシードとして取得するターゲット関連リードのリクルートから始まる。最初のターゲット関連リード(シードリード)は、「ベイト」として扱われ、MITObim [ref.30]およびIOGA [ref.21]パイプラインの場合と同様に、複数の拡張反復を通じてより多くのターゲット関連リードを取得する。ただし、リード拡張用のこのスクリプトのコアアルゴリズムは、「ワード」と呼ばれる特定の長さの部分文字列にリードをカットし、「受け入れられたワード」(または「ベイトプール」と呼ばれるハッシュテーブルに追加するハッシュアプ​​ローチを使用している。各エクステンションの反復中に、新しいターゲット関連のリードがカットされ、「ワード」として追加されるにつれて、「受け入れられるワード」は動的に増加する。次に、SPAdesを使用して、ターゲットに関連付けられた合計リードがFASTAアセンブリグラフ(「FASTG」)ファイルに新規にアセンブルされる。 FASTGアセンブリ内の非ターゲットコンティグは、接続、カバレッジ、およびBLASTヒット情報によってさらに自動的に識別およびトリミングされる。


f:id:kazumaxneo:20200308140558p:plain

GetOrganelle flowchart.    Githubより転載。


2020 9/12


インストール 

Github

本体 Github

#ここでは仮想環境に導入
mamba create -n getorganelle -y
conda activate getorganelle
mamba install -c bioconda -c biojj getorganelle -y

get_organelle_from_assembly.py

$ get_organelle_from_assembly.py 


############################################################################

ERROR: Insufficient arguments!

Missing option: output directory (followed after '-o')!

(getorganelle) kamisakakazumanoMac-mini:22222222 kazu$ get_organelle_from_assembly.py -h

Usage: get_organelle_from_assembly.py -g assembly_graph_file -F embplant_pt -o output --min-depth 10


GetOrganelle v1.6.4  get_organelle_from_assembly.py isolates organelle genomes

from assembly graph. Find updates in https://github.com/Kinggerm/GetOrganelle

and see README.md for more information.


Options:

  --version             show program's version number and exit

  -h                    print brief introduction for frequently-used options.

  --help                print verbose introduction for all options.

  -F ORGANELLE_TYPE     Target organelle genome type(s): embplant_pt/other_pt/

                        embplant_mt/embplant_nr/animal_mt/fungus_mt/anonym/emb

                        plant_pt,embplant_mt/other_pt,embplant_mt,fungus_mt

  -g INPUT_GRAPH        Input assembly graph (fastg/gfa) file.

  -o OUTPUT_BASE        Output directory.

  --min-depth=MIN_DEPTH

                        Minimum depth threshold of contigs. Default: 0.0.

  --max-depth=MAX_DEPTH

                        Maximum depth threshold of contigs. Default: inf.

  --no-slim=NO_SLIM     Disable the slimming process and directly disentangle

                        the assembly graph.

  -t THREADS            Maximum threads to use. Default: 1.

  --continue            Resume a previous run. Default: False.


get_organelle_from_reads.py -h

$ get_organelle_from_reads.py -h

Usage: 

###  Embryophyta plant plastome, 2*(1G raw data, 150 bp) reads

get_organelle_from_reads.py -1 sample_1.fq -2 sample_2.fq -s cp_seed.fasta -o plastome_output  -R 15 -k 21,45,65,85,105 -F embplant_pt

###  Embryophyta plant mitogenome

get_organelle_from_reads.py -1 sample_1.fq -2 sample_2.fq -s mt_seed.fasta -o mitogenome_output  -R 30 -k 21,45,65,85,105 -F embplant_mt


GetOrganelle v1.6.4  get_organelle_from_reads.py assembles organelle genomes

from genome skimming data. Find updates in

https://github.com/Kinggerm/GetOrganelle and see README.md for more

information.


Options:

  --version             show program's version number and exit

  -h                    print brief introduction for frequently-used options.

  --help                print verbose introduction for all options.

  -1 FQ_FILE_1          Input file with forward paired-end reads

                        (*.fq/.gz/.tar.gz).

  -2 FQ_FILE_2          Input file with reverse paired-end reads

                        (*.fq/.gz/.tar.gz).

  -u UNPAIRED_FQ_FILES  Input file(s) with unpaired (single-end) reads.

  -o OUTPUT_BASE        Output directory.

  -s SEED_FILE          Input fasta format file as initial seed. Default: /Use

                        rs/kazu/anaconda3/envs/getorganelle/lib/python3.6/site

                        -packages/GetOrganelleLib/SeedDatabase/*.fasta

  -w WORD_SIZE          Word size (W) for extension. Default: auto-estimated

  -R MAX_ROUNDS         Maximum extension rounds (suggested: >=2). Default: 15

                        (embplant_pt)

  -F ORGANELLE_TYPE     Target organelle genome type(s): embplant_pt/other_pt/

                        embplant_mt/embplant_nr/animal_mt/fungus_mt/anonym/emb

                        plant_pt,embplant_mt/other_pt,embplant_mt,fungus_mt

  --max-reads=MAX_READS

                        Maximum number of reads to be used per file. Default:

                        1.5E7 (-F embplant_pt/embplant_nr/fungus_mt); 7.5E7

                        (-F embplant_mt/other_pt/anonym); 3E8 (-F animal_mt)

  --fast=FAST_STRATEGY  ="-R 10 -t 4 -J 5 -M 7 --max-words 3E7 --larger-auto-

                        ws --disentangle-time-limit 180"

  -k SPADES_KMER        SPAdes kmer settings. Default: 21,55,85,115

  -t THREADS            Maximum threads to use. Default: 1

  -P PRE_GROUPED        Pre-grouping value. Default: 200000


データベースの準備

SeedDatabaseが準備されている。

git clone https://github.com/Kinggerm/GetOrganelle.git


実行方法

使い方が少し変更されている。

ステップ1

まず、ステップ2の”ーF”で指定する分類群のデータベースを取ってくる。ステップ2で”-F embplant_pt”と指定するなら以下のようにする(このコマンドを実行してない時はステップ2で自動でダウンロードされる)。

get_organelle_config.py -a embplant_pt

#2つ指定
get_organelle_config.py -a embplant_pt,embplant_mt


ステップ2

ショートリードから Embryophyta plant plastomeをアセンブリする。

get_organelle_from_reads.py -1 sample_1.fq -2 sample_2.fq \
-o plastome_output -R 15 -k 21,45,65,85,105 -F embplant_pt -t 20
  • -F    Target organelle genome type(s): embplant_pt/other_pt/
    embplant_mt/embplant_nr/animal_mt/fungus_mt/anonym/emb
    plant_ptembplant_mt/other_ptembplant_mtfungus_mt 
  • -R     Maximum extension rounds (suggested: >=2). Default: 15
    (embplant_pt)
  • -k    kmer settings. Default: 21,55,85,115
  • -t     threads to use. Default: 1
  • -1     Input file with forward paired-end reads (*.fq/.gz/.tar.gz). 
  • -2     Input file with reverse paired-end reads (*.fq/.gz/.tar.gz).
  • -u     Input file(s) with unpaired (single-end) reads.
  • -o     Output directory.
  • -s     Input fasta format file as initial seed. Default: /Use

最近のバージョンでは"-s"は不要。 


ショートリードから Embryophyta plant mitochondriaをアセンブリする。

get_organelle_from_reads.py -1 sample_1.fq -2 sample_2.fq \
-o mitochondria_output -R 50 -k 21,45,65,85,105 -P 1000000 -F embplant_mt -t 20
  • -R      Maximum extension rounds (suggested: >=2).  
  • -P      Pre-grouping value. Default: 200000


ショートリードからfungas mitochondriaをアセンブリする。

get_organelle_from_reads.py -1 sample_1.fq -2 sample_2.fq \
-s fungus_mt_seed.fasta --genes fungus_mt_genes.fasta -R 10 -k 21,45,65,85,105 -F fungus_mt -t 20


ショートリードからanimal mitochondriaをアセンブリする。

get_organelle_from_reads.py -1 sample_1.fq -2 sample_2.fq \
-s animal_mt_seed.fasta --genes animal_mt_genes.fasta -R 10 -k 21,45,65,85,105 -F animal_mt -t 20


前もって作成したアセンブリのグラフからスタートする。

get_organelle_from_reads.py -g assembly_graph.gfa -o plastome_output -F embplant_pt --min-depth 10 -t 20


Githubにはribosomal RNA (18S-ITS1-5.8S-ITS2-26S)をターゲットアセンブリする例なども載っています。Githubで確認して下さい。


コメント

オルガネラゲノムのアセンブリで苦戦して、色々検索している内にたどり着いたツールです。ショートリード情報のみでクロロプラストゲノムの完全なアセンブリができたのには驚きました。ONTのデータを使ってハイブリッドアセンブリしたデータと全く同じ配列長、配列組成の配列が出力されていたので、大きな問題は起きていないと思われます。

注意点ですが、WGSのデータを使用した場合、メモリはある程度多めに使います。計算に32GBくらいしかメモリリソースが利用できない場合、完遂するのは厳しいかもしれません("--memory-save"を参照)。また、シーケンスデータはる程度深く読んだものを準備する必要があります。

2022/12009

活発に光合成している組織由来のWGSだとオルガネラゲノムのコピー数は核ゲノムと比較して多かったりするので、その場合はリードを1~10%程度だけサブサンプリング(seqkit sampleで可能)して使うと良い結果が得られています。その理由として、オルガネラゲノムは単一のクローン性の配列とされていますが実際には頻度の低い配列のバリエーションがあるのか、シークエンシングエラーの配列を数千xのリードデプスがあるために拾ってしまっているのかと考えています。


2020 10/1

オルガネラゲノムアセンブラの性能比較を行った論文が出ています。


引用

GetOrganelle: a fast and versatile toolkit for accurate de novo assembly of organelle genomes

Jian-Jun Jin, View ORCID ProfileWen-Bin Yu, Jun-Bo Yang, Yu Song, Claude W. dePamphilis, Ting-Shuang Yi, De-Zhu Li

bioRxiv, Posted October 08, 2019


2020 9/12 

GetOrganelle: a fast and versatile toolkit for accurate de novo assembly of organelle genomes

Jian-Jun Jin, Wen-Bin Yu, Jun-Bo Yang, Yu Song, Claude W. dePamphilis, Ting-Shuang Yi & De-Zhu Li
Genome Biology volume 21, Article number: 241 (2020)


参考


ベストマッチするリファレンスゲノムを探す ReferenceSeeker

2020 3/8 コメント削除、タイトル修正


 公共データベースで利用可能な微生物ゲノムの数は増え続けており、多くのin-silico分析、例えば 一塩基多型の検出、scaffolding、比較ゲノミクス、に必要なリファレンスゲノムの最適な選択がますます困難になってきている。 ここでは、適切なリファレンスゲノムの迅速な決定のために、候補リファレンスゲノムの高速kmerプロファイルベースのデータベース検索とその後の高度に特異的な平均ヌクレオチド同一性(ANI)値の計算を組み合わせた新しいコマンドラインツールReferenceSeekerを紹介する。ReferenceSeekerは、候補リファレンスゲノムの高速kmerプロファイルベースのデータベース検索と、その後の特定の平均ヌクレオチドの計算を組み合わせたスケーラブルな階層的アプローチに従って行われる。RefSeqデータベースに基づいた細菌、古細菌、菌類、原生動物、およびウイルスの事前構築済みデータベースがダウンロード用に提供されている。ReferenceSeekerは、Pythonで実装されたオープンソースソフトウェアである。 ソースコードとバイナリは、GNU GPL3ライセンスでhttps://github.com/oschwengers/referenceseekerから無料でダウンロードできる。


 ReferenceSeekerは、クエリゲノムとRefSeqからの潜在的なリファレンスゲノム候補との間のkmerベースのゲノム距離をMash(Ondov et al。2016)を使って計算する。したがって、完全なゲノムまたは「代表的なゲノム」または「参照ゲノム」と記載されているもののみが含まれる。 ReferenceSeekerは、微生物分類群、つまりバクテリア古細菌、菌類、原生動物、およびウイルスの幅広いスペクトルに対して事前に構築されたデータベースを提供する。得られた候補について、(双方向)ANI計算によってランク付けし、デフォルトのしきい値(ANI> = 95%&保存されたDNA> = 69%)を満たすゲノムを選択する。ANIと保存されたDNA値の両方のを使う理由は、マッシュ距離はclosely relatedなゲノムのANI値とよく相関するが、保存されたDNA値については同じではないということである。 kmerベースのフィンガープリント比較だけでは、たとえばkmerを含むサブシーケンスが欠如しているのか、SNPが原因でkmerが欠落しているかどうかを区別できない。 保存されたDNAの割合(DNAアイデンティティの次に)は、多くの種類の分析にとって非常に重要である。


インストール

macos10.14にてcondaの仮想環境を作ってテストした(anaconda3(python3.7))。

依存

本体 Github

#ここでは仮想環境に導入
conda create -n referenceseeker -y
conda activate referenceseeker
conda install -c conda-forge -c bioconda -c defaults referenceseeker -y

> referenceseeker -h

$ referenceseeker -h

usage: referenceseeker [--crg CRG] [--ani ANI] [--conserved-dna CONSERVED_DNA] [--unfiltered] [--bidirectional] [--help] [--version] [--verbose] [--threads THREADS] <database> <genome>


Rapid determination of appropriate reference genomes.


positional arguments:

  <database>            ReferenceSeeker database path

  <genome>              target draft genome in fasta format


Filter options / thresholds:

  These options control the filtering and alignment workflow.


  --crg CRG, -r CRG     Max number of candidate reference genomes to pass kmer prefilter (default = 100)

  --ani ANI, -a ANI     ANI threshold (default = 0.95)

  --conserved-dna CONSERVED_DNA, -c CONSERVED_DNA

                        Conserved DNA threshold (default = 0.69)

  --unfiltered, -u      Set kmer prefilter to extremely conservative values and skip species level ANI cutoffs (ANI >= 0.95 and conserved DNA >= 0.69

  --bidirectional, -b   Compute bidirectional ANI/conserved DNA values (default = False)


Runtime & auxiliary options:

  --help, -h            Show this help message and exit

  --version, -V         show program's version number and exit

  --verbose, -v         Print verbose information

  --threads THREADS, -t THREADS

                        Number of used threads (default = number of available CPU cores)


Citation:

Schwengers O., Hain T., Chakraborty T., Goesmann A. (2019)

ReferenceSeeker: rapid determination of appropriate reference genomes.

bioRxiv 863621; doi: https://doi.org/10.1101/863621


GitHub:

https://github.com/oschwengers/referenceseeker


テストラン

git clone https://github.com/oschwengers/referenceseeker.git
cd referenceseeker/tests/
referenceseeker db Salmonella_enterica_CFSAN000189.fasta

出力

#ID Mash Distance ANI Con. DNA Taxonomy ID Assembly Status Organism

GCF_000439415.1 0.00003 100.00 99.55 1173427 complete Salmonella enterica subsp. enterica serovar Bareilly str. CFSAN000189

GCF_002760915.1 0.01000 99.00 89.86 149539 complete Salmonella enterica subsp. enterica serovar Enteritidis 56-3991

GCF_900205275.1 0.01522 98.61 83.13 90370 complete Salmonella enterica subsp. enterica serovar Typhi

mash distance、ANI、taxonomy、complete genomeかどうかなどが表示される。


データベース

https://github.com/oschwengers/referenceseekerから構築済みrefseqゲノムデータベースをダウンロードする。ここではprotozoaを選んだ。

wget https://zenodo.org/record/3562005/files/protozoa.tar.gz?download=1
tar -xvf protozoa.tar.gz?download=1

ゲノムのfastaが収納されたprotozoaディレクトリができる。


実行方法

データベースとゲノムを指定する。

referenceseeker protozoa/ input_genome.fasta --ani 0.95
  • --ani   ANI threshold (default = 0.95)
  • --threads    Number of used threads (default = number of available)


引用

ReferenceSeeker: rapid determination of appropriate reference genomes

O. Schwengers, T. Hain, T. Chakraborty, A. Goesmann

bioRxiv, Posted December 19, 2019


2020

Schwengers et al., (2020). ReferenceSeeker: rapid determination of appropriate reference genomes. Journal of Open Source Software, 5(46), 1994, https://doi.org/10.21105/joss.01994


(ヒトゲノム)ハイパフォーマンスなハイブリッドアセンブラ WENGAN

2020 3/7 パラメータの表記ミス修正 


 ロングリードシーケンシング技術の継続的な改善により、高品質のゲノムを約束する新しいde novoアセンブリ時代が始まっている。ただしロングリードのみを使用して、大規模で反復性の高いヒトゲノムの正確なゲノムアセンブリを生成することは困難であることが証明されている。これまで、エラーが発生しやすいロングリードからアセンブリされたヒトゲノムのほとんどは、コンセンサスの質をさらにポリッシュするために正確なショートリードの追加を必要とする。ここでは、ハイブリッドアセンブリ、WENGAN、およびONT PromethION、PacBio Sequel、Illumina、MGIテクノロジーで生成されたシーケンスデータの組み合わせを使用した4つのヒトゲノムの新規アセンブリの新規アルゴリズムの開発について報告する。 WENGANは、コンセンサス品質だけでなくアセンブリの連続性に取り組むために、ショートリードとロングリードのシーケンス情報を活用する効率的なアルゴリズムを実装している。結果として得られるゲノムアセンブリは、高い連続性(contig NG50:16.67-62.06 Mb)、少ないアセンブリエラー(contig NGA50:10.9-45.91 Mb)、良好なコンセンサス品質(QV:27.79- 33.61)、および高い遺伝子完全性(BUSCO complete:94.6 -95.1%)、低い計算リソースしか消費しない(CPU時間:153-1027)。特に、半数体CHM13サンプルのWENGANアセンブリは、コンティグNG50 62.06 Mb(NGA50:45.91 Mb)を達成した。これは、現在のヒトリファレンスゲノム(GRCh38 contig NG50:57.88 Mb)の隣接性を超えている。低い計算コストで最高の品質を提供するWENGANは、ヒトゲノムのde novoアセンブリ民主化に向けた重要なステップである。 WENGANアセンブラは、https;//github.com/adigenova/wenganから入手できる。

 Wenganは新しいゲノムアセンブラであり、現在のほとんどのロングリードアセンブラとは異なり、すべてのリード対すべてのリードの比較を完全に回避する。 Wenganの背後にある重要な考え方は、シーケンスグラフ上にパスを構築することで、ロングリードのアライメントを推測できるということである。 これを実現するために、WenganはSynthetic Scaffolding Graphと呼ばれる新しいシーケンスグラフを作成する。 SSGは、未加工のロングリードから抽出された合成メイトペアライブラリのスペクトルから構築される。 その後、エッジの推移的な削減を実行することにより、より長いアライメントが構築される。 Wenganのもう1つの特徴は、読み取った情報を追跡することで自己検証を実行することである。 Wenganは、アセンブリプロセスのさまざまなステップでミスアセンブリを特定する。 


Githubより

WENGANはマプドゥングン語である。 マプドゥングンは、チリ中南部の最大の先住民であるマプチェ族の言語であり、WENGANは「道を作る」という意味を持つ。 


2020/03現在、genomeサイズ4Gb以上はサポートされていない。


https://twitter.com/search?q=WENGAN%20assembler&src=typed_query


インストール

ubuntu18.04LTSでテストした。

本体 Github

https://github.com/adigenova/wengan/releasesからダウンロード、解凍する。

cd wengan-v0.1-bin-Linux/

> perl wengan.pl

# perl wengan.pl 


  Usage example :

    # Assembling Oxford nanopore and illumina reads with WenganM

    wengan.pl -x ontraw -a M -s lib1.fwd.fastq.gz,lib1.rev.fastq.gz -l ont.fastq.gz -p asm1 -t 20 -g 3000


  Wengan options:


   Mandatory options***:

      -x preset [ontlon,ontraw,pacraw,pacccs]

      -a Mode [M,A,D]

      -s short-reads [fwd1.fastq.gz,rev1.fastq.gz..]

      -l long-reads.fq.gz

      -g 3000 [genome size in Mb]

      -p prefix


   General Options :

      -h [detail information]

      -t cores [1]

      -c <pre-assembled short-read contigs>

      -i <insert size lists>

      -n <show pipeline comands>;


   Advanced Options (Change the presets):

      FastMin-SG options:

        -k k-mer size [15-28]

        -w minimizer window [5-15]

        -q minimum mapping quality [20-60]

        -m moving window [150]

      IntervalMiss options:

        -d Minimum base coverage [def:7]

      Liger options:

        -M Minimum contig length in backbone [def:2000]

        -R Repeat copy number factor [def:1.5]

        -L Length of long mate-edges [def:100000]

        -N Number of long-read needed to keep a potencial erroneus mate-edge [def:5]

        -P Minimum length of reduced paths to convert them to physical fragments [def:20kb]


 wengan.pl -h for detailed usage information.


実行方法

リードは前もってgzip圧縮しておく。


illuminaのショートリードとONTのロングリードのアセンブリ(WenganM)

wengan.pl -x ontraw -a M -s pair1.fq.gz,pair2.fq.gz -l ont.fq.gz -p test1 -g 3000 -t 40
  • -a <Mode>   [M,A,D]
  • -g 3000   [genome size in Mb]
  • -l    long-reads.fq.gz
  • -s   short-reads [fwd1.fastq.gz,rev1.fastq.gz..]
  • -t    cores [1]
  • -p   prefix


illuminaの ショートリードとPacbioのロングリードのアセンブリ(WenganA)

wengan.pl -x pacraw -a A -s pair1.fq.gz,pair2.fq.gz -l pac.fq.gz -p test2 -g 3000 -t 40


BGIの ショートリードとONTのウルトラロングリードのアセンブリ(WenganM)

wengan.pl -x ontlon -a M -s pair1.fq.gz,pair2.fq.gz -l ont.fq.gz -p test3 -g 3000 -t 40


PacbioのCCSロングリードのアセンブリ(WenganM)

wengan.pl -x pacccs -a M -l ccs.fq.gz -p test4 -g 3000 -t 40


illuminaの ショートリードとONTのウルトラロングリードのアセンブリ(WenganD: ヒトゲノムだと600GB程度メモリを要求)

wengan.pl -x ontlon -a D -s pair1.fq.gz,pair2.fq.gz -l ont.fq.gz -p test5 -g 3000 -t 40


プリアセンブリされたショートリード由来コンティグを指定する。

#Minia3
wengan.pl -x pacraw -a M -s pair1.fq.gz,pair2.fq.gz -l pac.fq.gz -p test6 -g 3000 -c contigs.minia.fa -t 40

#Abyss
wengan.pl -x pacraw -a A -s pair1.fq.gz,pair2.fq.gz -l pac.fq.gz -p test7 -g 3000 -c contigs.abyss.fa -t 40

#DiscovarDenovo
wengan.pl -x pacraw -a D -s pair1.fq.gz,pair2.fq.gz -l pac.fq.gz -p test8 -g 3000 -c contigs.disco.fa -t 40


引用

WENGAN: Efficient and high quality hybrid de novo as- sembly of human genomes
Alex Di Genova, Elena Buena-Atienza, Stephan Ossowski, Marie-France Sagot

bioRxiv, Posted November 25, 2019


2020 12/15 

Efficient hybrid de novo assembly of human genomes with WENGAN

Alex Di Genova, Elena Buena-Atienza, Stephan Ossowski & Marie-France Sagot
Nature Biotechnology (2020)


関連


ドラフトアセンブリをショートリードやロングリードでpolishする NextPolish


2021 7/26 link追加、タイトル変更


 ロングリードシーケンシング技術は長い連続性を持つゲノムを生成できるが、エラー率が高くなる。 そこで、長いリードでアセンブリされたゲノムの配列エラーを効率的に修正するツールであるNextPolishを開発した。 この新しいツールは、高品質のショートリードからK-merをスコアリングおよびカウントし、多数のベースエラーを含むゲノムアセンブリを洗練するように設計された2つの相互リンクモジュールで構成されている。NextPolishは、ヒトおよび植物(Arabidopsis thaliana)のゲノムを使用して速度と効率を評価すると、シーケンスエラーをより速く、より高い修正精度で修正することでPilonよりも優れていた。NextPolishはCおよびPythonで実装されている。 ソースコードhttps://github.com/Nextomics/NextPolishから入手できる。


約15〜10%のシーケンスエラーの生の第3世代シーケンス(TGS)ロングリードを修正するにはNextDenovoを使用する。


Documentation


インストール

ubuntu18.04LTSにて、python2の環境を作ってテストした。

依存

  • Python 2.7
  • Psutil
  • Drmaa (Only required by running under non-local system)
  • time (apt install time)

本体 Github

#python2環境に入れる。condaを使っているなら
conda create -y -n python2 python=2.7
conda activate python2
conda install -c anaconda psutil drmaa

#本体
wget https://github.com/Nextomics/NextPolish/releases/download/v1.1.0/NextPolish.tgz  
tar -vxzf NextPolish.tgz
cd NextPolish
make -j

./nextPolish -h

# ./nextPolish -h

usage: nextPolish [-l FILE] [-v] [-h]


nextDenovo:

Fast and accurately polish the genome generated by noisy long reads


exmples:

nextPolish run.cfg


optional arguments:

  -l FILE, --log FILE  log file (default: log.info)

  -v, --version        show program's version number and exit

  -h, --help           please use the config file to pass parameters


テストラン

nextPolish test_data/run.cfg

[INFO] 2020-03-01 13:34:35,457 merge_bam done

[INFO] 2020-03-01 13:34:35,467 analysis tasks done

[INFO] 2020-03-01 13:34:35,477 total jobs: 2

[INFO] 2020-03-01 13:34:35,478 Throw jobID:[1737] jobCmd:[/data/NextPolish/test_data/01_rundir/02.kmer_count/05.polish.ref.sh.work/polish_genome0/nextPolish.sh] in the local_cycle.

[INFO] 2020-03-01 13:34:35,982 Throw jobID:[1750] jobCmd:[/data/NextPolish/test_data/01_rundir/02.kmer_count/05.polish.ref.sh.work/polish_genome1/nextPolish.sh] in the local_cycle.

[INFO] 2020-03-01 13:34:36,995 polish_genome done

[INFO] 2020-03-01 13:34:36,996 nextPolish has finished, and final polished genome files:

[INFO] 2020-03-01 13:34:36,996  /data/NextPolish/test_data/./01_rundir/02.kmer_count/*polish.ref.sh.work/polish_genome*/genome.nextpolish.part*.fasta 


実行方法

#Prepare sgs_fofn、2つ分のペアエンドfastqがあるなら
ls reads1_R1.fq reads1_R2.fq reads2_R1.fq reads2_R2.fq > sgs.fofn

#Create run.cfg
genome=input.genome.fa
echo -e "task = 1212\ngenome = $genome\nsgs_fofn = sgs.fofn" > run.cfg

#Run
nextPolish run.cfg

#Finally polished genome
cat 03.kmer_count/*polish.ref.sh.work/polish_genome*/genome.nextpolish.part*.fasta > input.genome.nextpolish.v2.fa


チュートリアルでは、ショートリードだけ、ロングリードだけ、ショート・ロング両方を使ったdraft assemblyのpolishing手順が説明されています。

https://nextpolish.readthedocs.io/en/latest/TUTORIAL.html#polishing-using-long-reads-only

引用
NextPolish: a fast and efficient genome polishing tool for long read assembly

Hu J, Fan J, Sun Z, Liu S

Bioinformatics. 2019 Nov 28. pii: btz891


2021 

こちらの論文でナノポアのリードの修正に使われています。

https://www.nature.com/articles/s41438-020-00455-1